
If your tubers have been in the ground 120 days, you may go ahead and dig them up now! It is not necessary to wait for a killing frost. If you’re in a growing zone which gets freezing temperatures and snow, you will need to dig your tubers up and store them inside during winter.
After digging them up, follow these steps:
- Rinse off the tuber clumps. I have a hose attachment with various settings. I set it on “jet spray”.
- Inspect each tuber clump for leafy gall and crown gall.
- Cut off all hairy bits and anythign small than the size of a pencil.
- Cut all the old stalks to 1/2″ from the base.
- Allow the tubers to dry to touch no more than 24 hours, before packign them in storage.
I highly recommend storing the clumps of tubers over winter. Here are the steps to do that successfully!
- Use a large plastic container with a top.
- Choose a packing medium to use inside the container
- peat moss
- vermiculite
- hamster bedding
- white pine needles
- *** Avoid using paper, paper bags, and cardboard boxes. All of these paper products suck moisture out of the tubers.
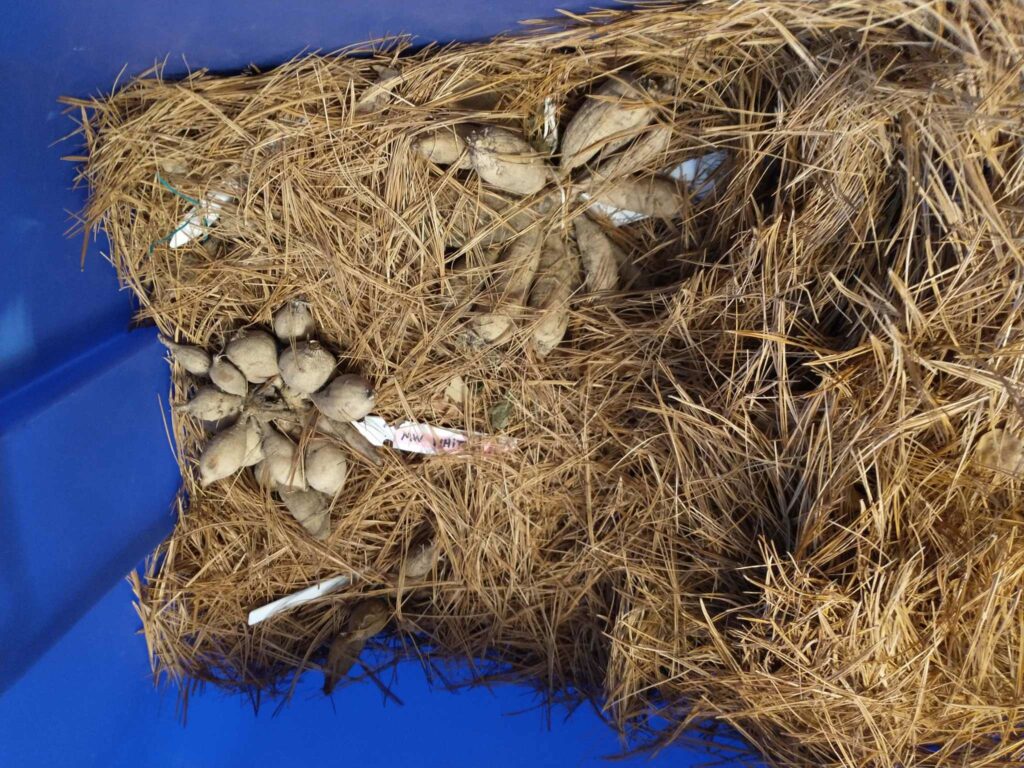
I have used white pine needles as a packing medium successfully for several years. I have a big white pine tree next to my driveway. Every fall, during October, my white pine tree drops its needles on my driveway! I just rake them up and use those to store my tubers!
- Layer tuber clumps in the packing medium. Begin by putting a layer of packing medium in the bottom of the container. Then add a layer of tuber clumps. Repeat this. Be sure the packing medium completely covers the last layer of tubers at the top.
- Leave the top to the container off for the first week, then close the top.
- Move the container to a cool, dark location. The ideal temperature is 45 degrees (f). If the storage temp is 50(f) or higher, your tubers may begin sprouting!
- Check on your tubers every 3-4 weeks. Inspect them!
Why Check on the tubers? If something unexpected happens you can fix it! Those people that don’t check on their tubers at all during winter can be surprised when they unpack them in the spring — What could have happened!
Here is my check list for checking tubers every 3-4 weeks:
- Look for any tubers that may be rotting. Sometimes a mother tuber will rot since it was growing directly below the stalk. If you do find one, simply cut off the rotten part or the whole tuber. Dust any fresh cuts with cinnamon (a natural fungicide).
- Look for a white powdery appearance which indicates mold on the tubers. If I see this, I simply go over those moldy tubers with a Lysol disinfectant wipe. No worries, they will be fine!
- Look for shriveled dry tubers. These will look just fine when planted in soil. Do not attempt to spritz water on the tubers or soak the tubers! Remember tubers have rnot developed a root system so they cannot take up water. If you do this, the tubers will begin to rot.
I usually divide my clumps of tubers during the last 2 weeks in February, then begin waking them up and pre-sprouting them inside, before planting them outside after last frost. It will be exciting to share with you all my new way to wake up tubers from their winter nap! Stay tuned!